Planting
Here is a basic guideline for planting a bare root fruit tree:
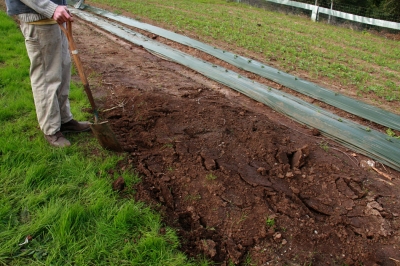
Choose your site.
Check to make sure the soil is neither too wet nor too dry.
You will need a shovel, garden fork, long-handled rake, fertililzer, compost, and mulch.
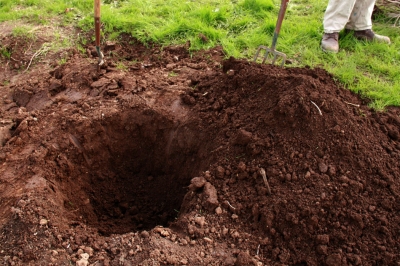
Dig a hole 2'x 2' x 18" deep.
Dig a larger hole if you plan on using a gopher basket.
When digging, notice when you encounter a different colored soil- this is your subsoil. Keep it separate from your topsoil, making 2 piles.
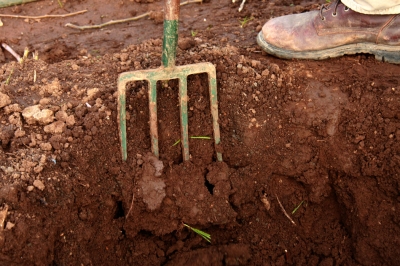
As you dig in clay soils, slick sides can develop from the back of your shovel.
Fracture the sides of your hole with the garden fork. If not, these slicks can harden and become an inpenetratable wall that the roots will have a hard time growing in.
Penetrate the bottom of the hole with the garden fork to aerate the soil.
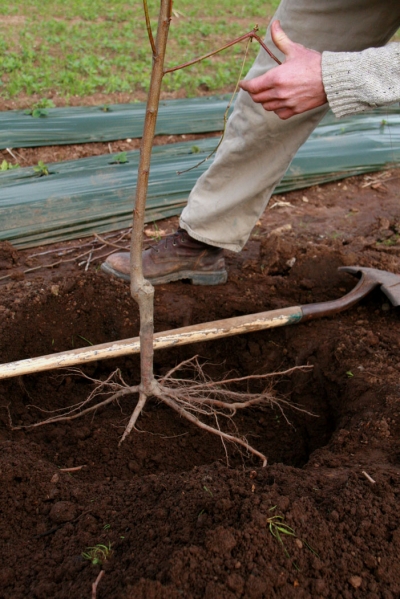
Backfill your hole with about 80% of the soil you removed. Subsoil goes in first, then top soil
Use a long-handled rake or shovel to lay across the hole to find your soil level.
Set the tree so that the top roots are just below the soil surface and the graft union scar is facing north.
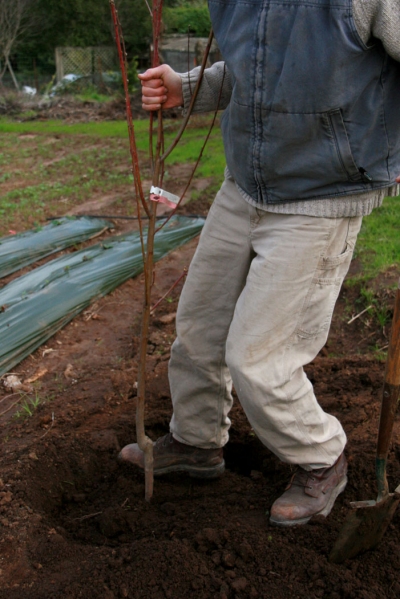
Once the tree is set in its place, backfill with the remaining soil.
Once the roots are covered, hold onto the trunk of the tree and gently pull up as you use your foot to compact the soil all around the tree's roots.
It is important to fill in all air gaps around the roots with the backfill soil- this ensures that the roots will not dry out.
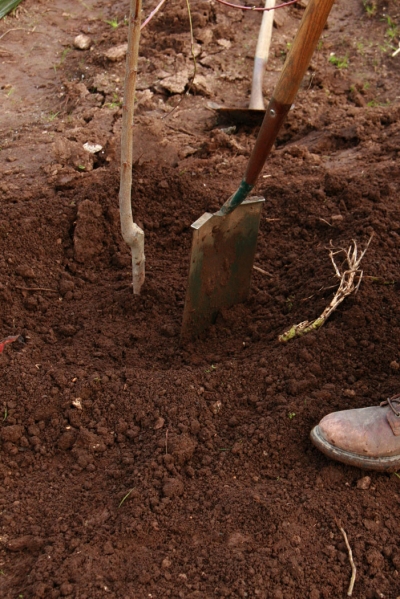
Create a circular burm 18" from the trunk of the tree- this is the area where you will apply fertilizer, compost, and mulch
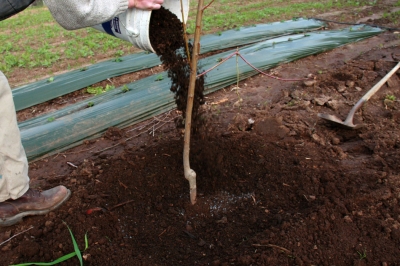
Top Dressing
Fill the berm up with water, let it settle, and then do it again. Soaking the tree like this will usually take care of its water needs until the rains end. Mulch can take a couple of years to break down. If there is still plenty of mulch in year 2 or 3, simply pull it away from the tree, apply your compost/fertilzer/greens, and then push mulch back on top.
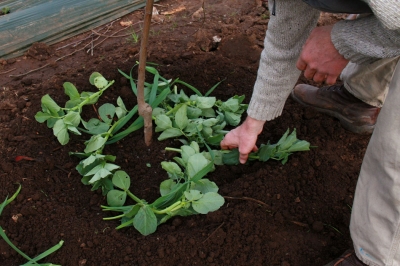
Add cover crops or green plant material 2-4"on top of the fertilizer and compost.
Keep all plant material 4-6" away from the trunk of the tree.
Optional: top with cardboard as a weed suppressant.
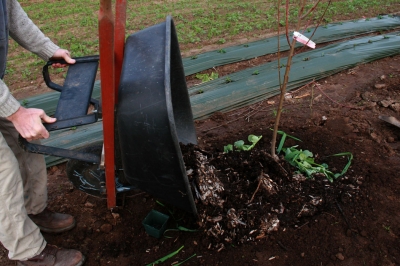
Optional: lay your drip tube or micro sprinkler tubing first.
Top everything off with 3-5" of mulch (wood chips, leaves (non-fruit tree), straw, etc.)
Your tree is planted and ready to grow!
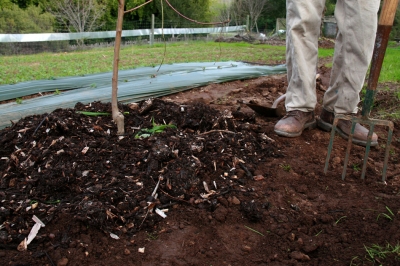
Follow this top dressing program for the first 3 years of the tree's life.
Mulch can take a couple of years to break down. So, if there is plenty of mulch in year 2, simply pull it away from the tree, apply your compost/fertilizer/greens, and then push mulch back where it was.
After year 3, follow these same steps, but if you have achieved your desired tree size, there is no need to apply fertilizer.
Prune
There are many training styles, but here we will discuss 2 different tree forms:
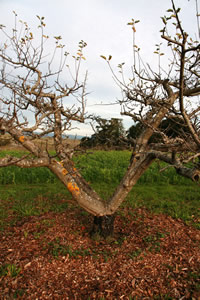
Open Center
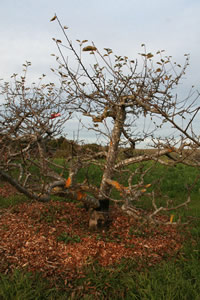
Modified Central Leader
Open Center
(for all stone fruit, apples, or pears)
This form is one of the easiest to create with your fruit trees. It consists of 3-6 primary branches growing from the trunk at 65 degree angles, creating an open center or vase form. Each primary branch will be spaced horizontally from its neighbor to ensure easy light penetration and picking.
Modified Central Leader
(apples and pears)
This form consists of multiple tiers of branches. With the lower tier always growing wider than the top tier, it forms a pyramidal shape. We recommend growing 2 tiers with the bottom tier consisting of 5-8 branches and the top tier consisting of 3-5 branches. Growing a third tier usually starts to get a little tall. The bottom tier's branches will extend 5-7' from the trunk, while the upper tier's branches will extend 2-4' from the trunk. The beauty of this form is that 70-80% of your yield will come from the lower tier, and only 20-30% in your upper tier. This means less ladder work! Make sure that you create a 2' gap in between tiers where there are no branches coming from the trunk. This will ensure greater light penetration to the lower branches.
Training
Don't worry if your branches are in the wrong place. Use string and stake or a spreader to train them while they are still young and malleable.
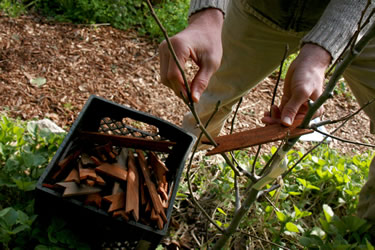
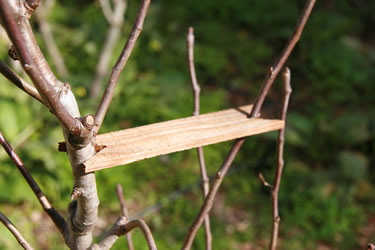
Open Center Tree Form
Follow below for a step-by-step guide for pruning your newly planted tree:

When choosing a tree, look for multiple branches moving away from the trunk at a 65 degree angle.
More branches equals more options for you to choose your main 3-6 scaffold branches.
Don't worry if you can't find a multi-branched tree; once in the ground, the tree will grow the branches it needs.
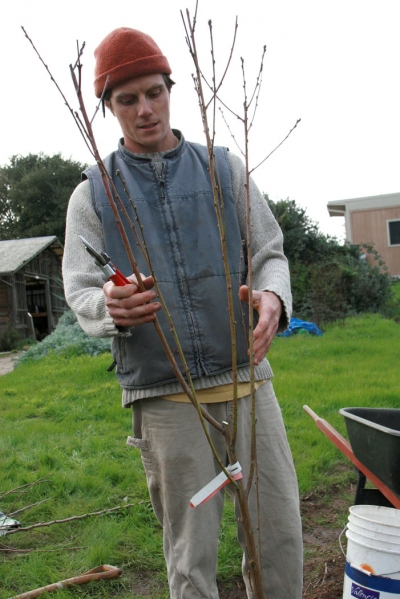
Select 3-6 primary branches, spaced vertically on the trunk and horizontally spaced apart from one another.
Use your training tools to adjust branches, as needed. Remember that this is your opportunity to build the main structure of the tree.
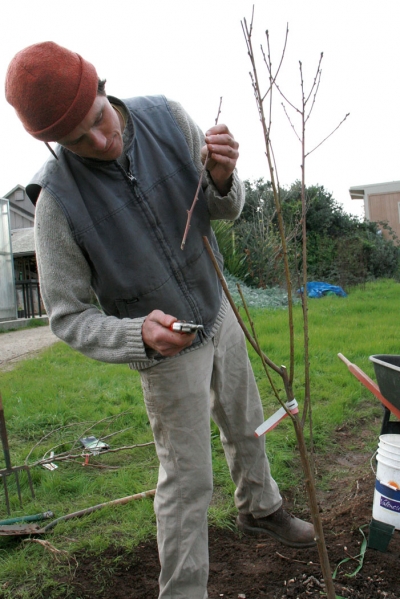
Remove all unwanted branches so all that remain are the chosen 3-6 primary branches.
In general, head back each primary branch by 1/2 its length.
If the tree is small and has thin branches, head back each primary 3/4 of its length; if the tree is robust and thick, head it back 1/4 of its length. Remember that the more you cut, the more it will grow.
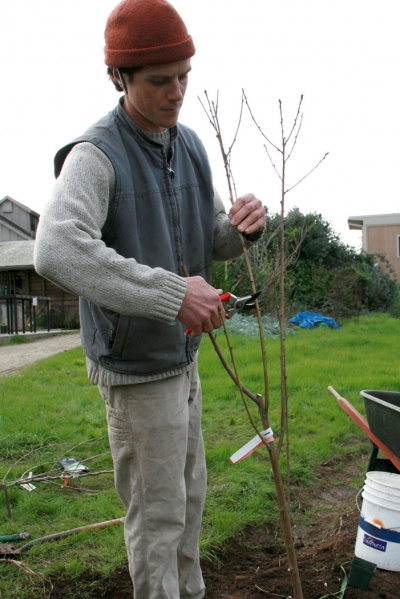
When pruning, cut 1/4-1/2" above a bud to decrease the risk of die back.
Think of the bud as a directional arrow so that when you are pruning for growth, always prune to a bud facing the direction you want the tree to grow.
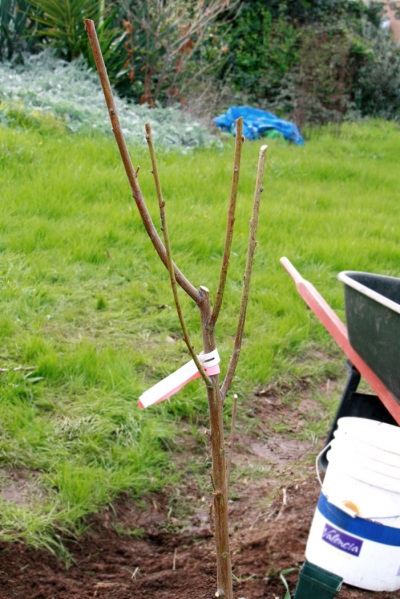
This is an open center tree with 4 primary branches that have been pruned.
As the tree grows in the spring, adjust the limbs so that they grow in the right direction: out and away from the trunk and its neighbors.
Remove any unwanted shoots in the spring.
Modified Central Leader
Follow below for a step-by-step guide for pruning your newly planted tree:
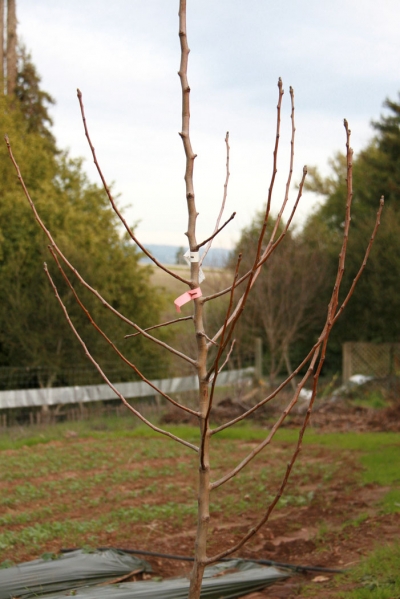
Select a tree with many branches growing off of the trunk at 45 degree angles.
The more branches the tree has, the better because this will give you more options to choose from.
Don't worry if your tree doesn't have that many branches- they will grow.
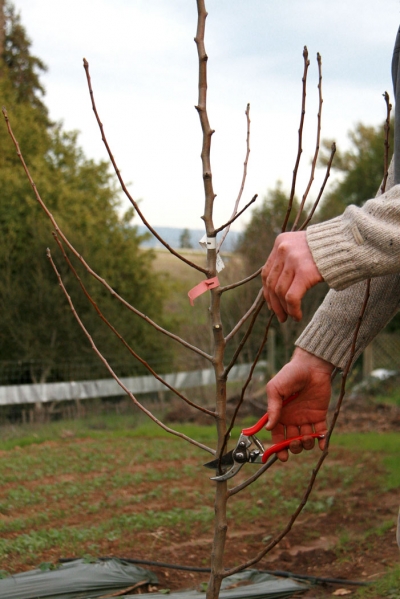
Look for 5-8 branches spaced evenly around the tree- vertically and horizontally.
Remove all other branches.
Adjust any limbs that may need to move a little to the right or left; or up or down.
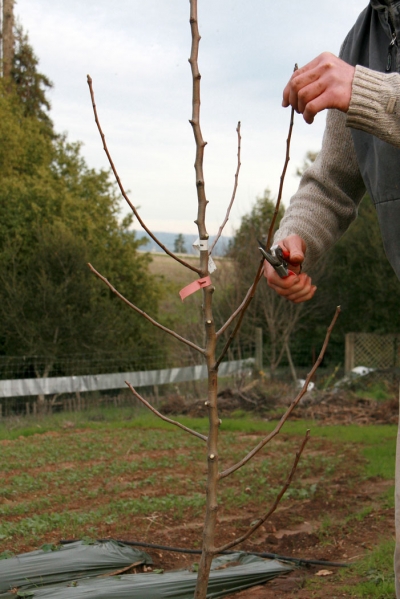
Head all selected branches to stimulate growth.
Generally, remove 50% of the branch.
If the branch is thin and weak, head back 75%. If the branch is thick and robust, head back 25%.
Cut to a bud pointing in the direction of desired growth.
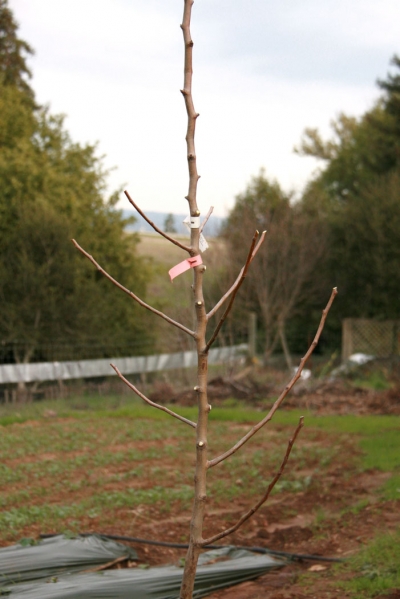
Be sure to head the central leader 18' above the top branch.
This photo depicts a pruned modified central leader tree with 8 primary branches.
In the tree's first spring, adjust the limbs as they start growing and remove any unwanted growth.
Irrigate
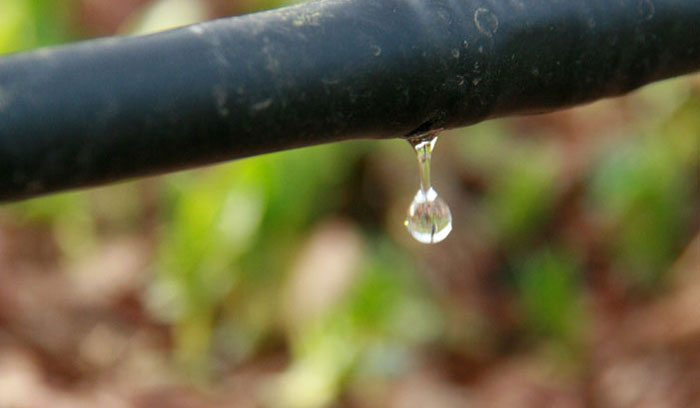
- Young fruit trees (years 1-3) will require water every 4-7 days throughout the dry season (depending on soil type).
- Once established, watering once a week or once every other week may be adequate.
- In general a young tree may drink up 5-10 gallons of water a week and a mature tree 15-30 gallons a week.
- After the crop is off the tree, we can decrease the amount of water by 1/3.
- Drip tubing is the most efficient irrigation tool out there. We recommend using a 1/2” in-line drip tube.
Deciduous Trees
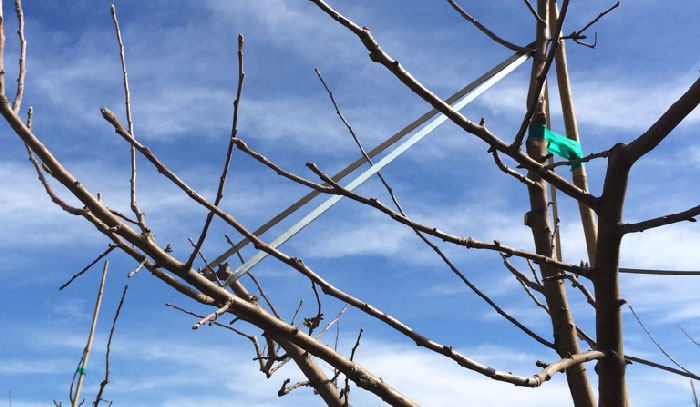
Annual Care
The majority of the fruit trees that we grow lose their leaves every winter and then bloom and set new growth every spring. They do not require a ton of work through the year, but definitely need attention at specific times throughout the year to maintain fruitfulness and health.
Thinning Fruit
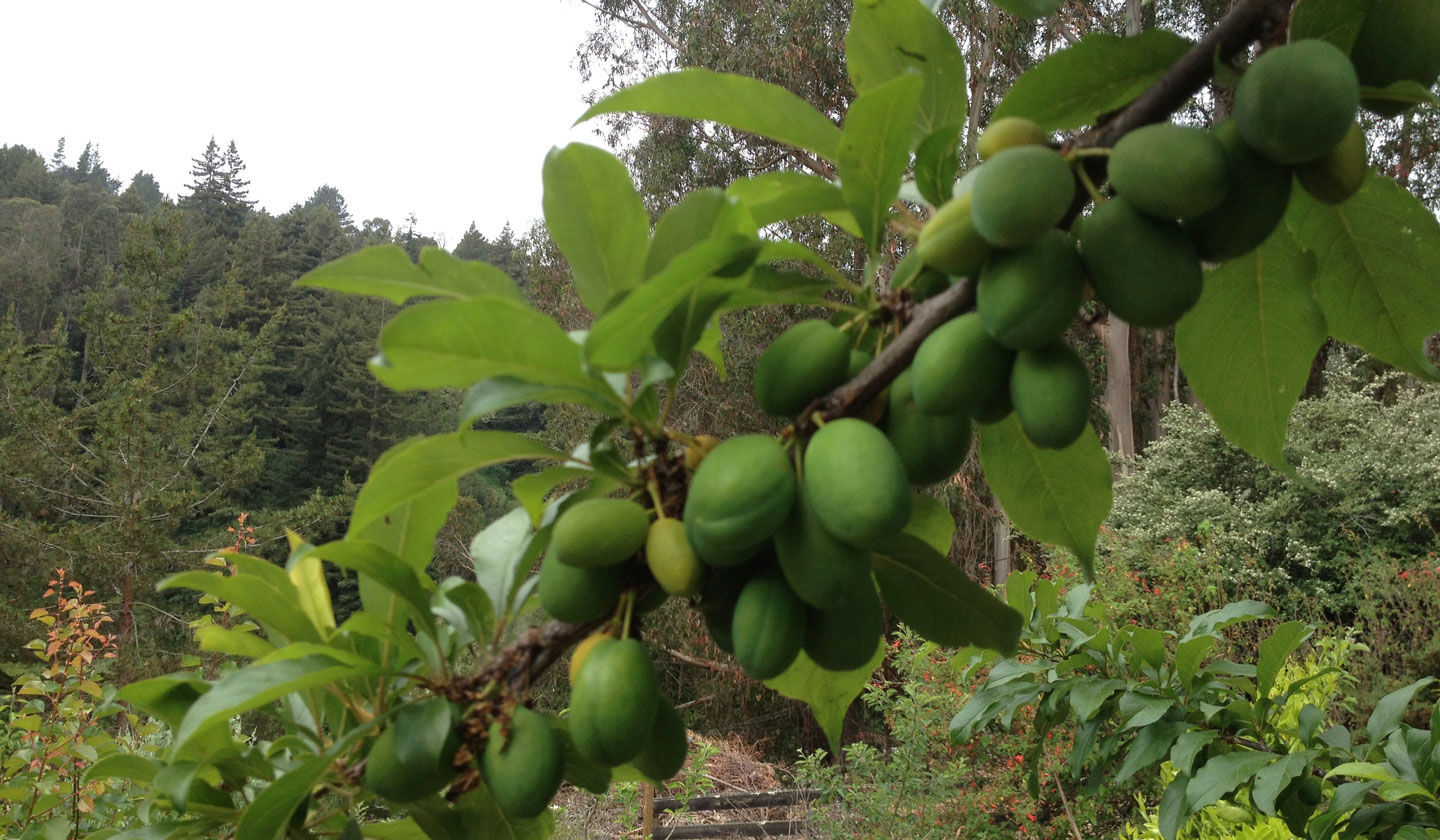
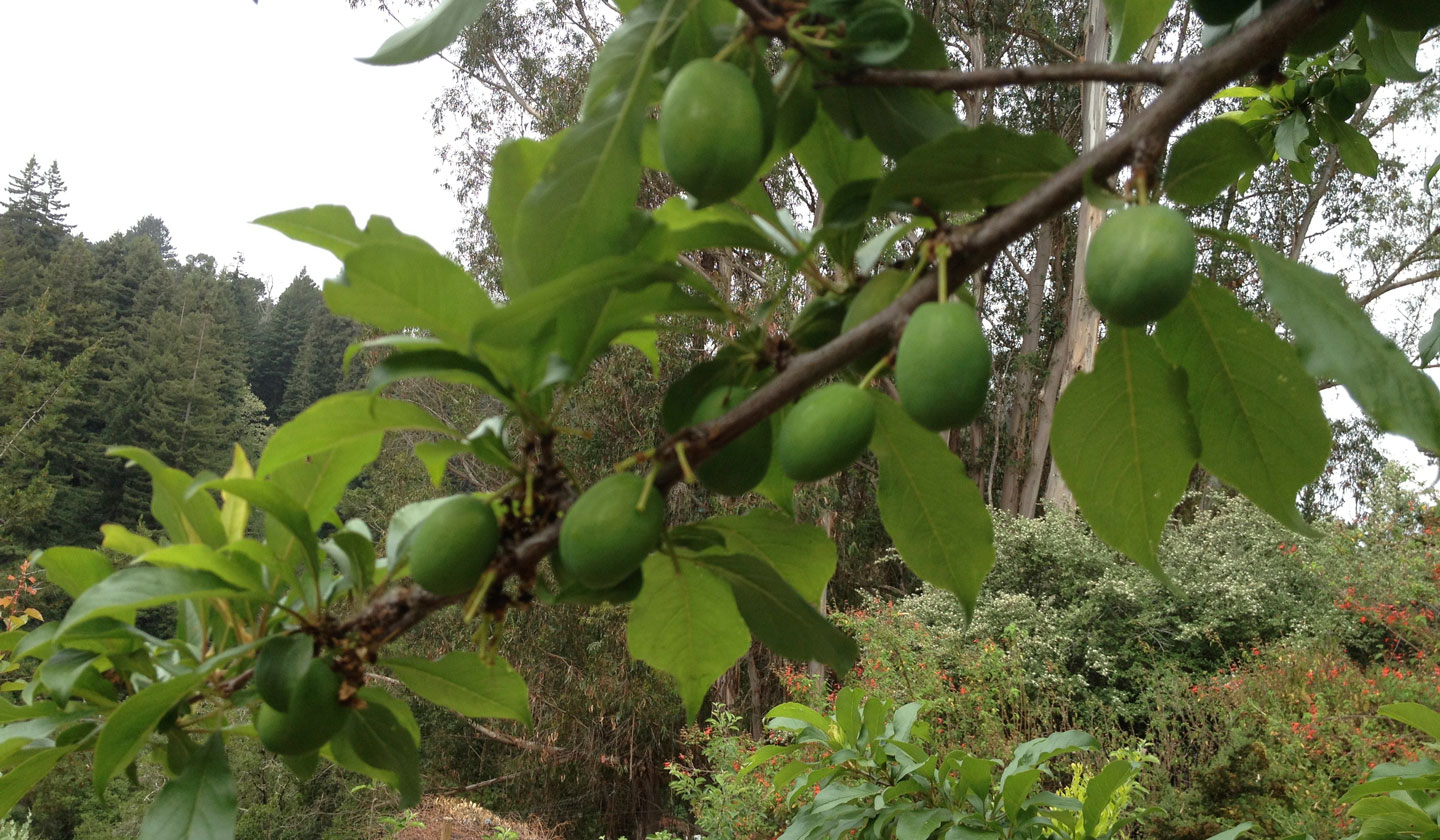
After the fruit tree’s flowers have been pollinated, it’s time to thin the amount of fruit. This will ensure proper size and a higher quality fruit. Yes, this is one of the harder tasks to accomplish, but with proper thinning, you will have the same amount of fruit whether a bunch of nice sized fruits or a ton of small fruits.
Citrus / Avocados
Annual Care
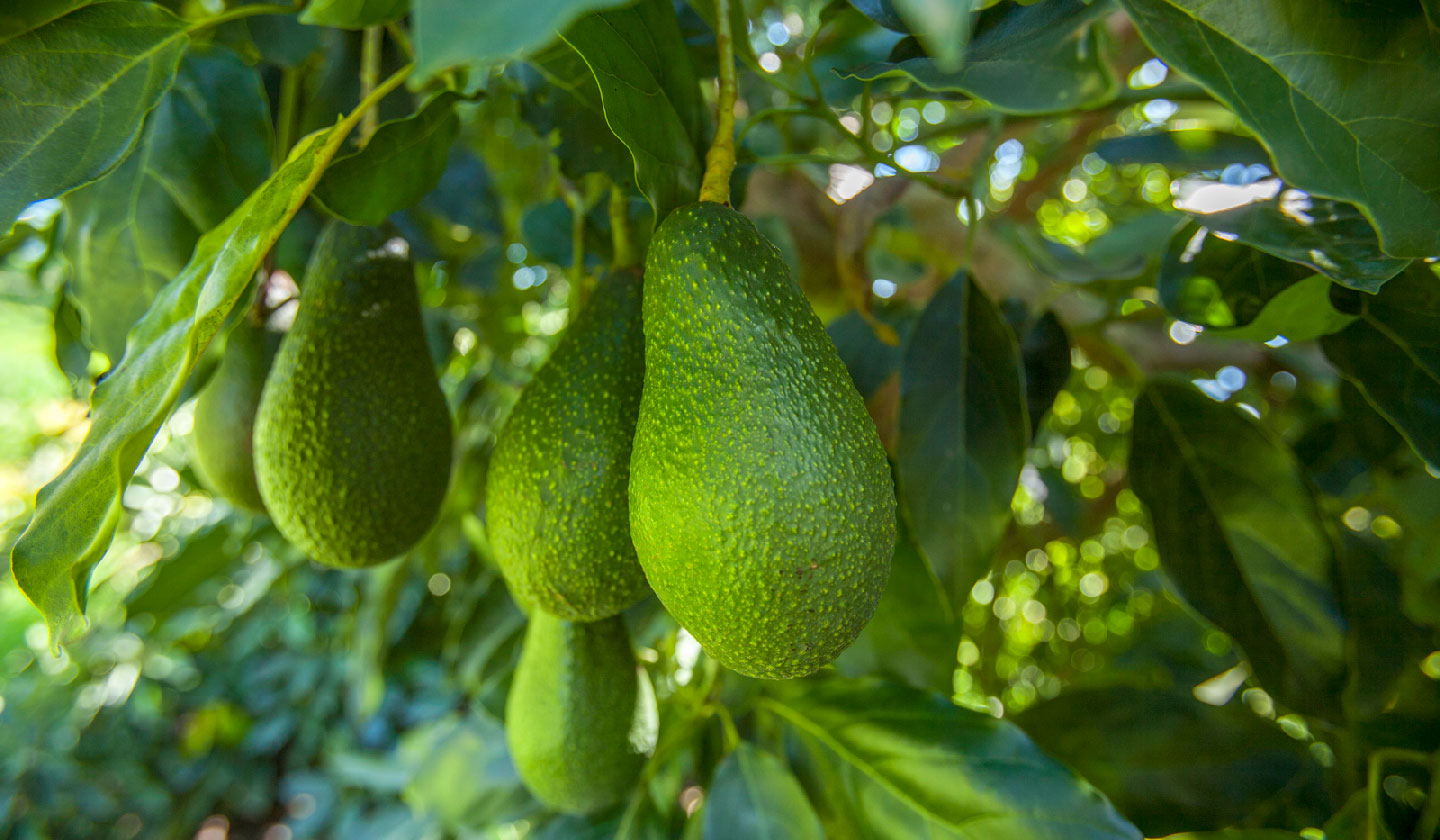
In the Bay Area, we live right at the far reaches of the citrus and avocado growing zone. Most citrus and avocados can deal with a little cold in the winter but too much can cause leaves to burn, shoots to shrivel, and occasionally kill the tree all the way to the ground. If temperatures get much below 30, best practice is to cover them with frost blankets. They also demand good drainage, so planting on a fast draining mound is a key to success if you have a heavy soil.
Blueberries
Annual Care
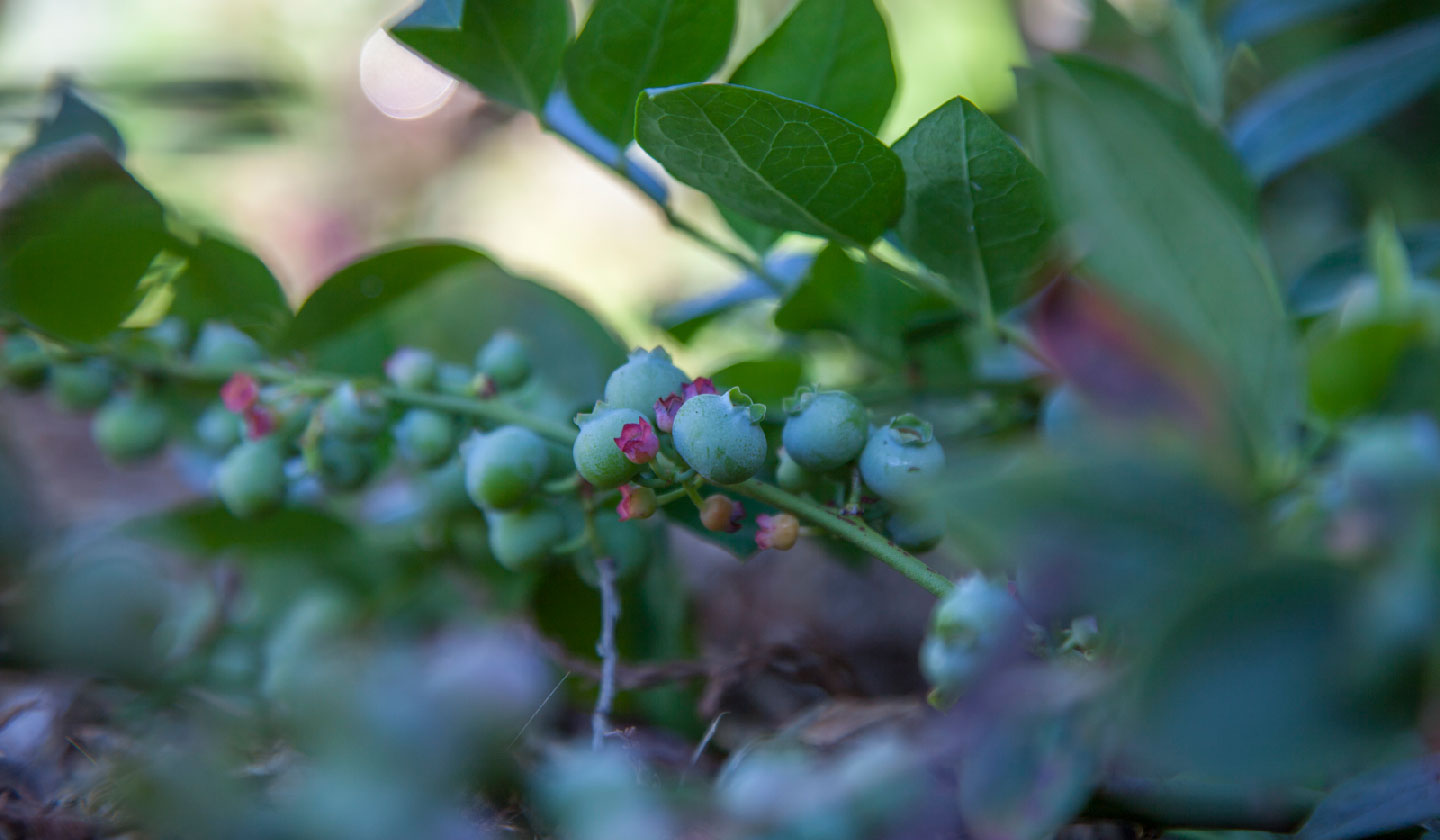
Who says we can't grow blueberries in California?! Southern Highbush blueberries require less chill than their Northern counterparts, and will crop reliably every year if you spend the time to prep the soil well. Blueberries require a soil pH of around 4.8, which is much lower than most of our soils. To lower the pH of the soil before planting, mix equal parts peat moss, acidic compost and mini fir bark. Till that mix into your native soil and plant. Once established, plants will provide buckets of berries for 40 years or more.
Raspberries / Blackberries
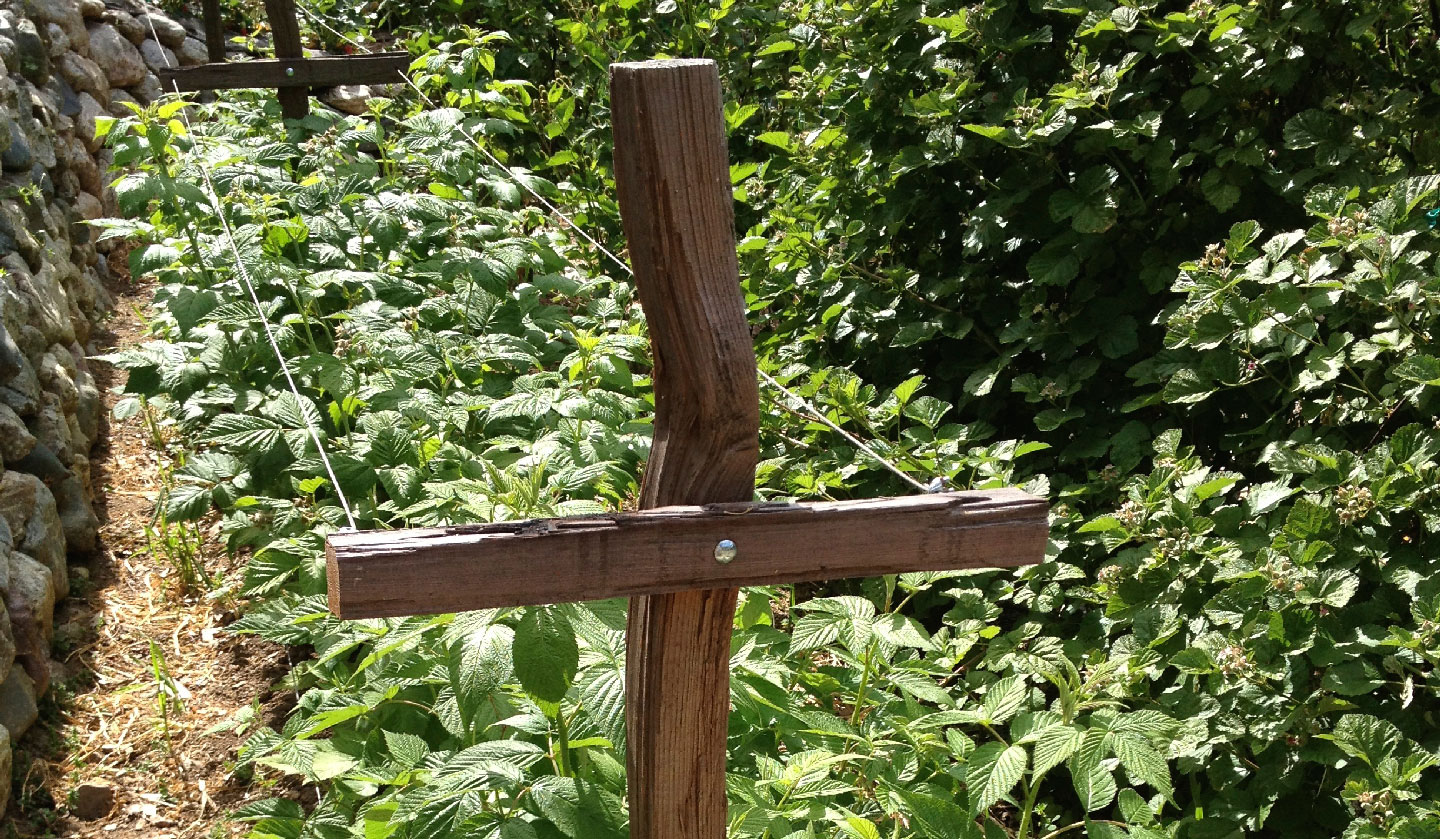
Annual Care
These are essential to the home orchard. Pick the proper varieties, and you can be picking fruit from June through Sept. In the culture of berries, you’ll see two main types: primocane-bearing on current season wood, and floricane-bearing on 2-year wood. By having a mix of these, you will ensure an extended harvest window.
Apple Scab
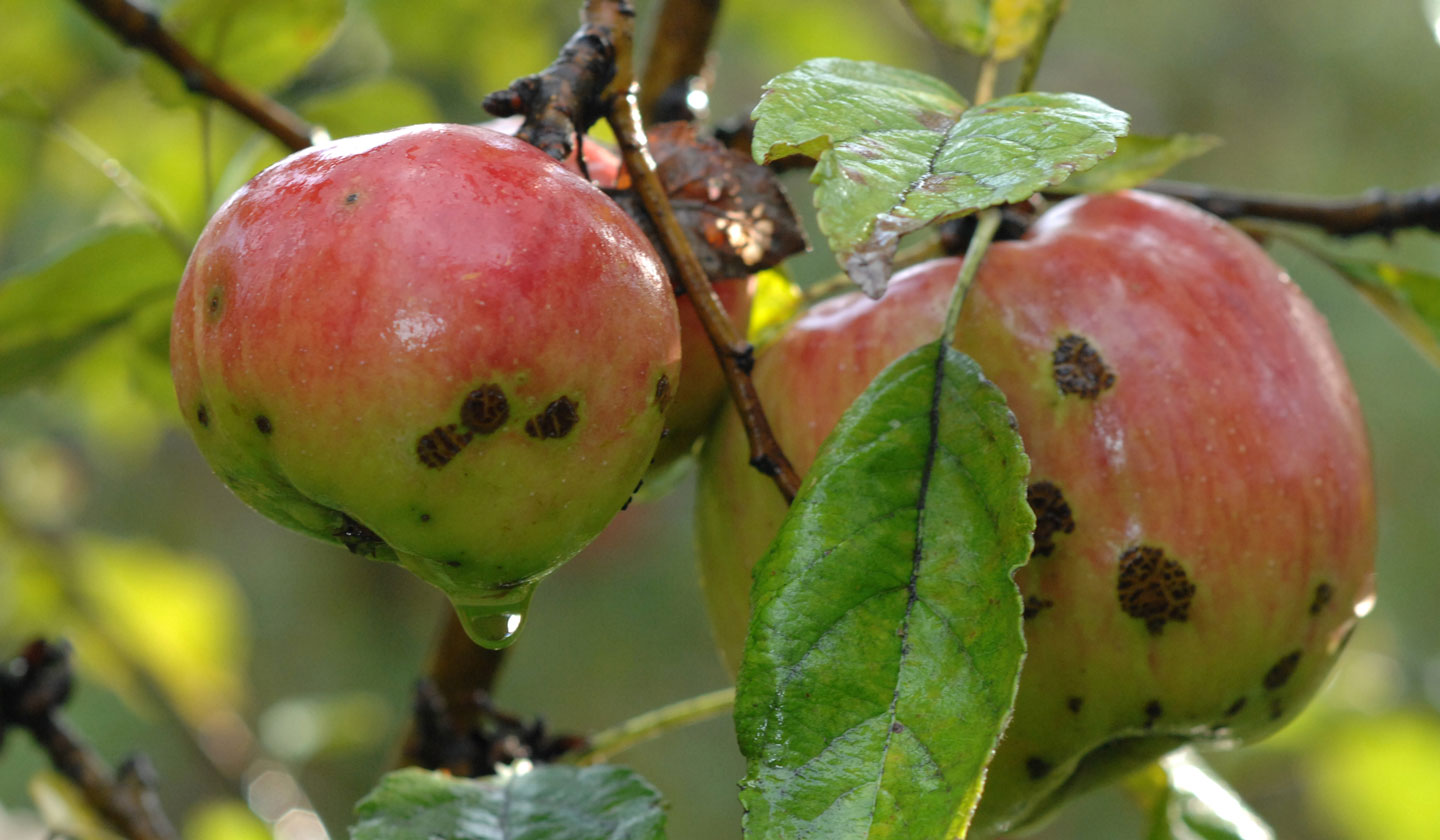
Mostly cosmetic, this disease is fairly common, and many home growers deal with the little bit that their apples and pears may have. If your site has an abundance of scab (both leaf and fruit), use a fungicide during bud swell, which will help knock it back. Follow the directions in terms of timing and you should see great results.
Learn MoreFire Blight
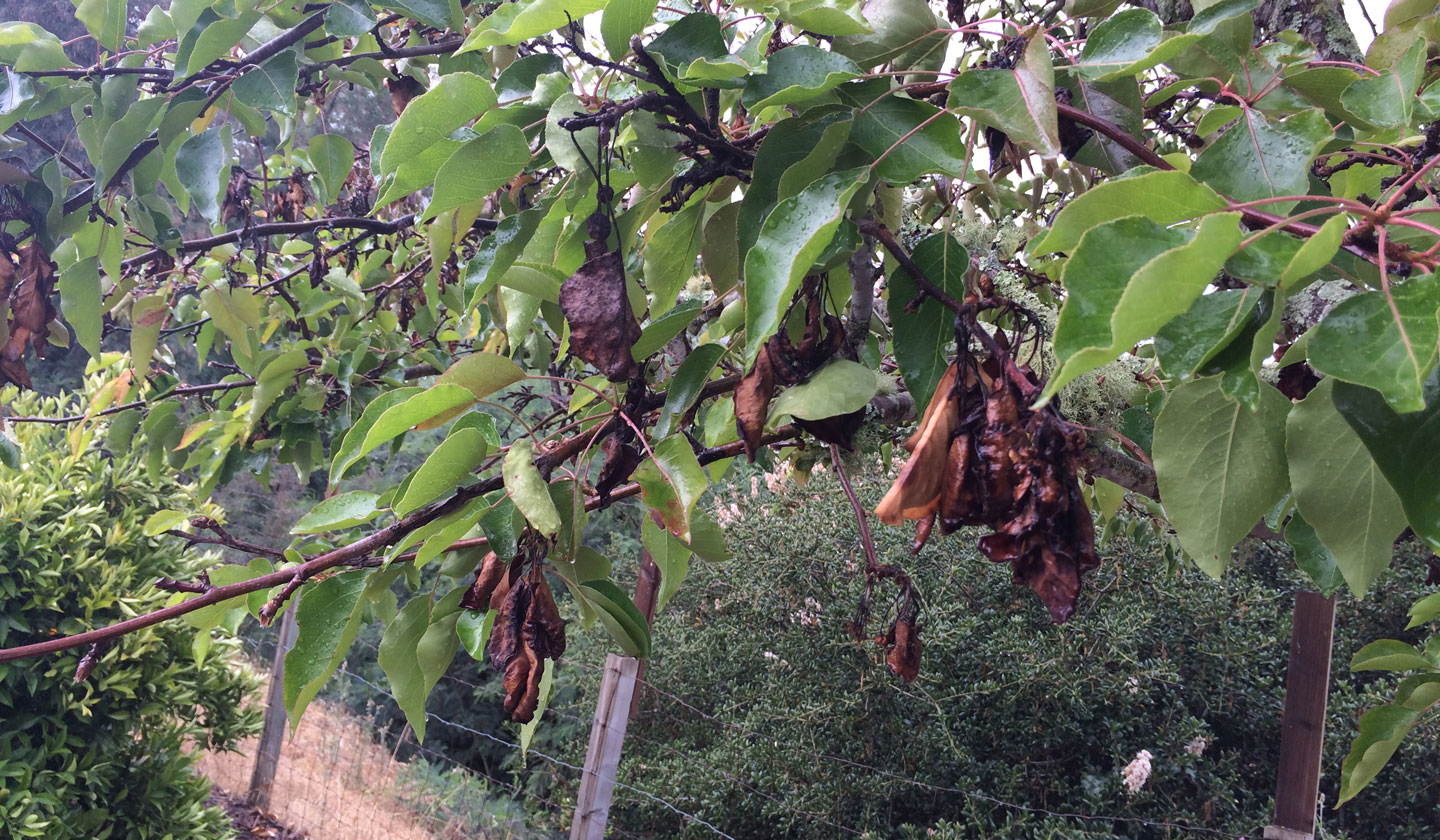
A nasty bacterial disease affecting pears and apples. The bacteria overwinters in cankers on the tree. When the warm weather in spring hits, it becomes active. Once active, it will spread through the tree via the cambium. For new infection, pollinators are the carriers, as they can spread it from flower to flower. If you see a new shoot in the spring go limp, form a crookneck, and turn black, go out immediately and remove the shoot. The removal cut must be made 12” below the canker on the limb. Be sure to disinfect your tools between every cut. Many times this can be pretty devastating.
Learn MoreBrown Rot
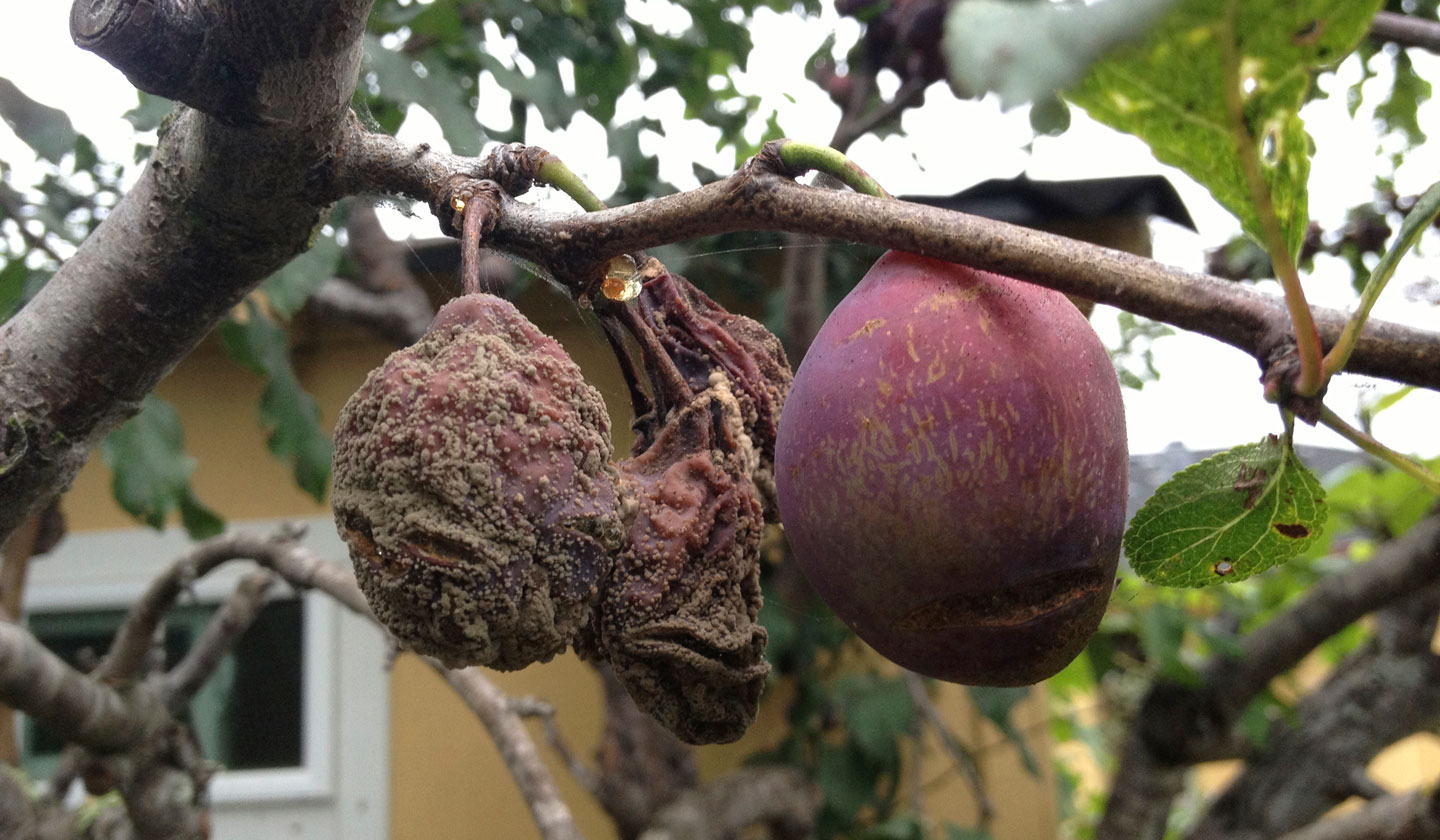
Mostly affects peaches, nectarines, cots, plums. Brown rot shows up as mold on the flowers, shoots, larger limbs, and then again later in the summer on your fruit. Its pretty devastating to watch all this beautiful fruit start to ripen, and mold over night. Prevention is key: clean up all mummies from the tree and the ground so that spores from one season don’t infect the following season. Timing is crucial when using a spray. The spores become active in the spring, so start a spray program just as the buds are starting to swell.
Learn MorePeach Leaf Curl
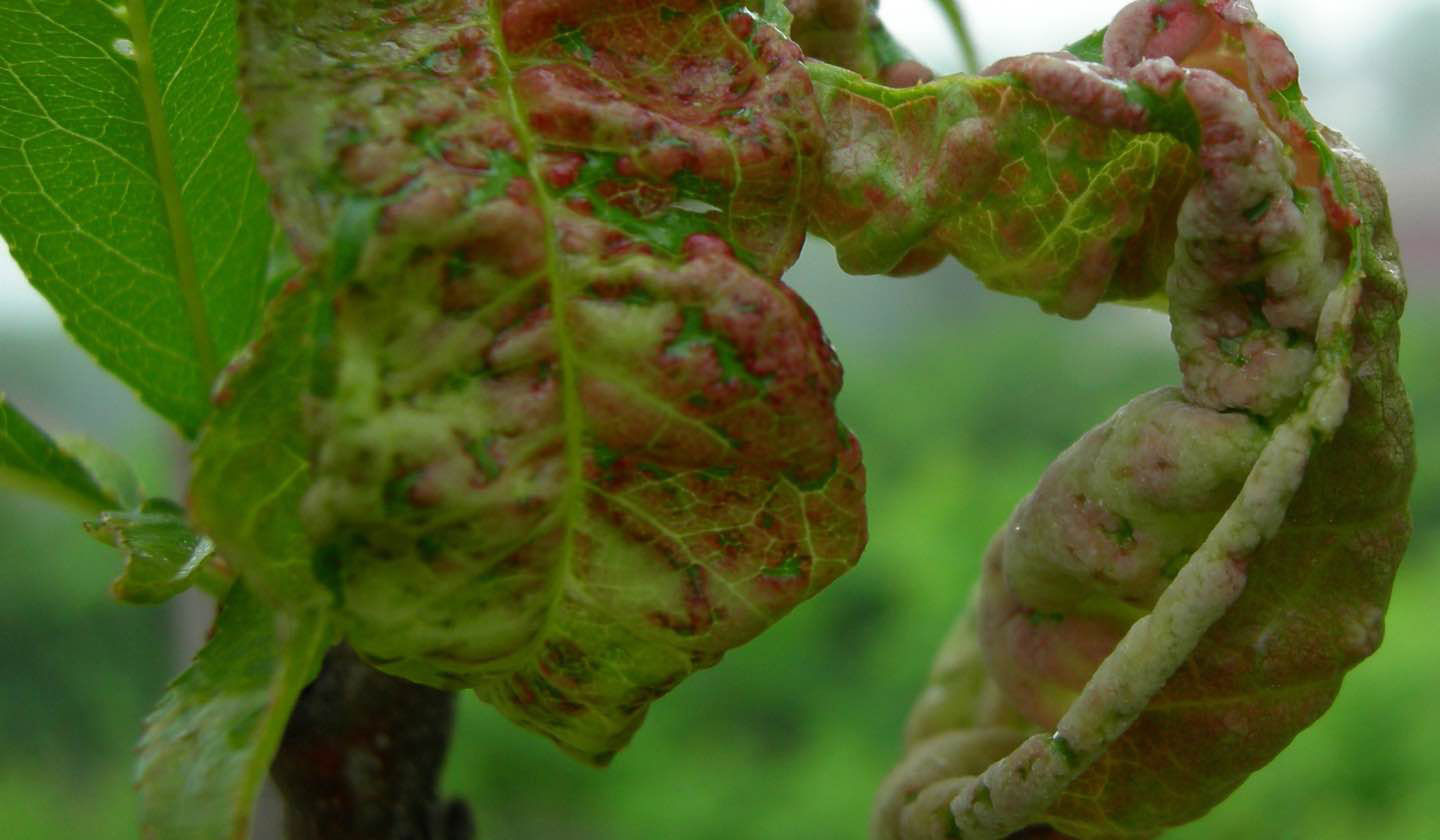
Affects peaches and nectarines. Probably the ugliest of all fungal diseases. Leaves will emerge in the spring and start twisting and contorting. In bad years, all the leaves will be infected, fall off and then regrow. A good practice in years like that is to supplement the trees with a dose of high Nitrogen organic fertilizer to help it grow back its leaves.
Learn MoreEutypa
A fungal limb die-back disease that is found mostly on apricots, but also cherries and grapes. This is spread by pruning in wet weather. We advise only pruning apricots in the summer. If you look at your tree and a section of it looks like it is severely drought stressed, but the rest looks great, good chance the tree is infected. Remove the infected limb as soon as possible.
Learn MoreRust

Causes major early defoliation on most stone fruit. Rust presents itself as grayish pustules on the under side of the leaves. The time to treat for the fungal disease is early in the growing season just as the leaves emerge.
Learn MorePowdery Mildew
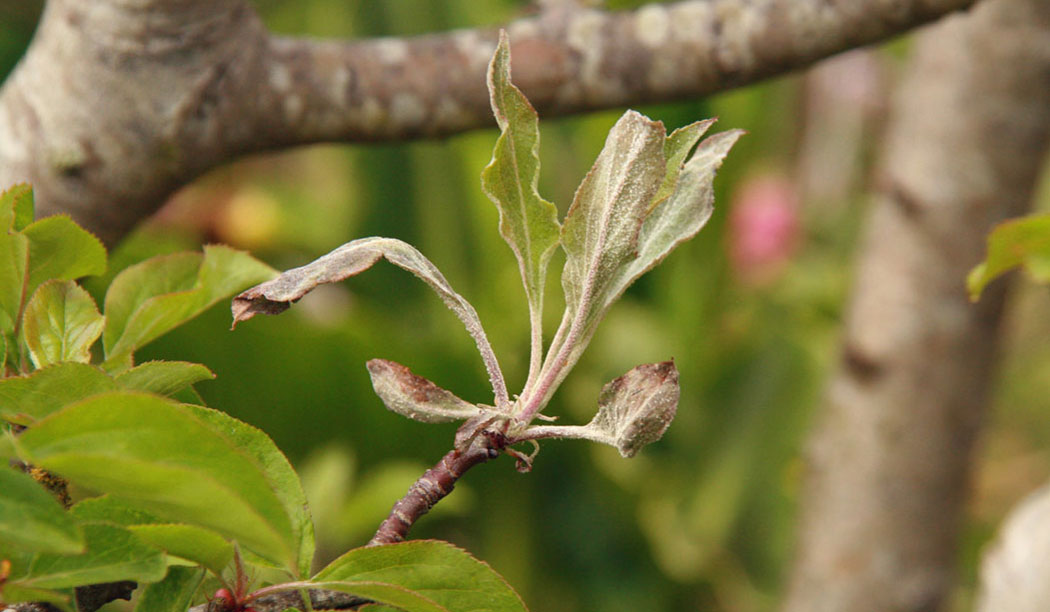
A summer fungal disease. It shows up on many of our fruiting plants. Early detection is key. Use of organic oils, especially Neem oil, will assist with eradication.
Learn MoreShothole Fungus
Affects most stone fruit. Shothole fungus usually appears in late spring as brown spots on the leaves, which then fall out, giving the leaf an appearance of having shot holes through it. Falltime is the best time for control. It's not that devastating to the tree, though it is quite unsightly.
Learn MoreCoddling Moth
Coddling moth is the lovely worm in the apple. It presents itself first with a ‘sting’ on the skin of the fruit. This is where the larvae burrowed into the fruit. Cut it open and you will find a small worm eating away. We have 2 generations of the moth each year (typically), and without any type of control you can easily see 100% infection within a number of years. In larger orchard settings (1 acre or more), pheromone technology is used by flooding the orchard with female pheromone, therefore disrupting the mating cycle. Small scale this strategy doesn’t work. Prevention is key: pick up all ‘stung’ fruit throughout the season (on the tree or off) and dispose of it.
Learn MoreScale
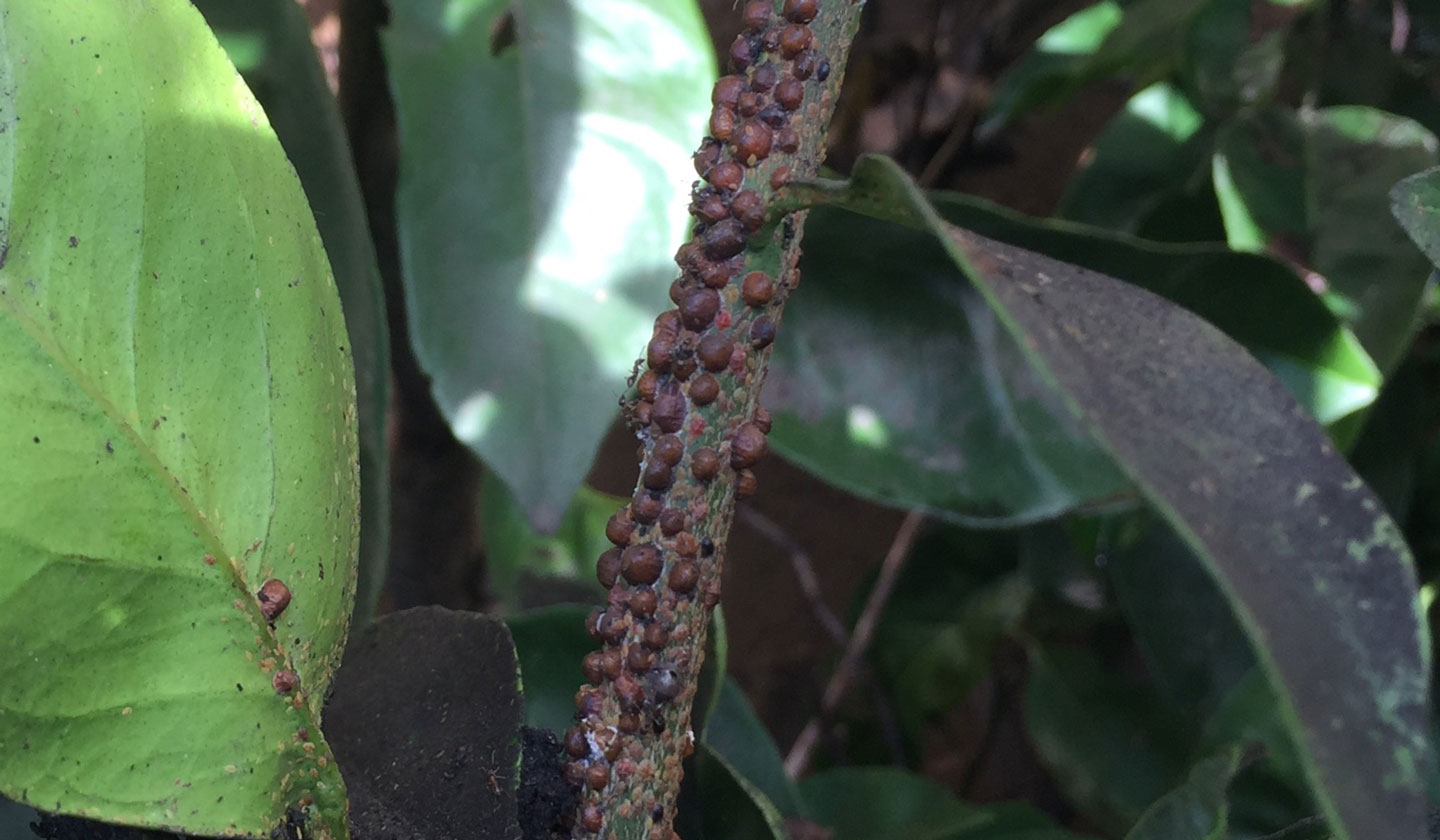
Found mostly in citrus, these scaly crustacean looking pests can become a major nuisance if not addressed early. Application of Tanglefoot is critical to slowing the spread of them (see below in Aphid description). Once the ants stop, we blast the scale off with a jet nozzle from a hose. This works great.
Aphids
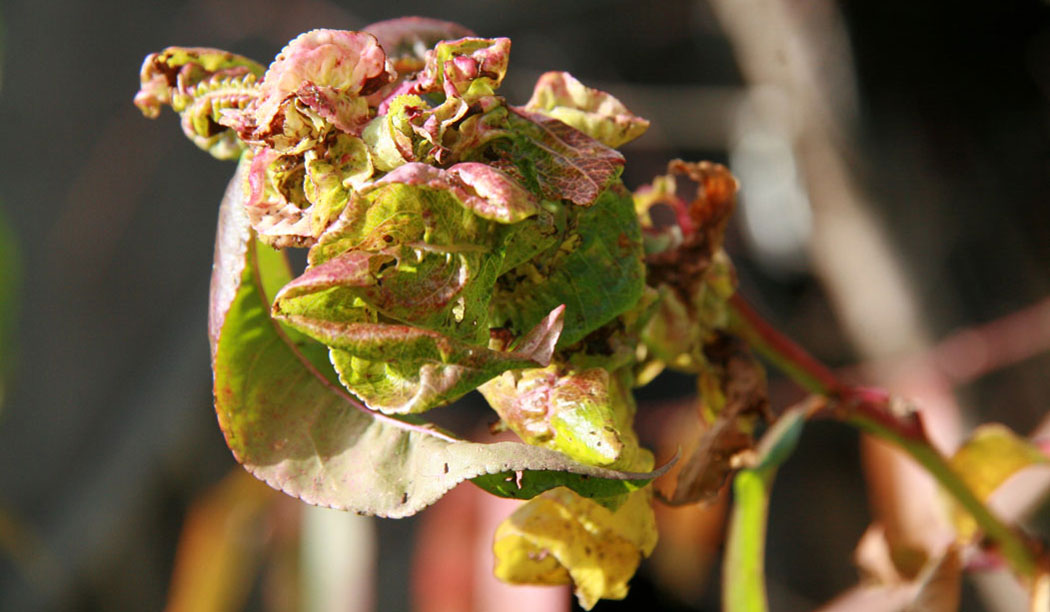
The world is full of aphids. There are many species that love fruit trees. Early detection is crucial. If you see aphids, you will usually notice ants. They have a pretty sweet relationship happening, where the aphids get protection and a free ride from the ants, and the ants harvest the sweet exudate from the insects. Applying tanglefoot around the base of the tree works well. This sticky substance inhibits the ants from crawling up in the tree, breaking up the relationship.
Learn MorePEAR SLUG
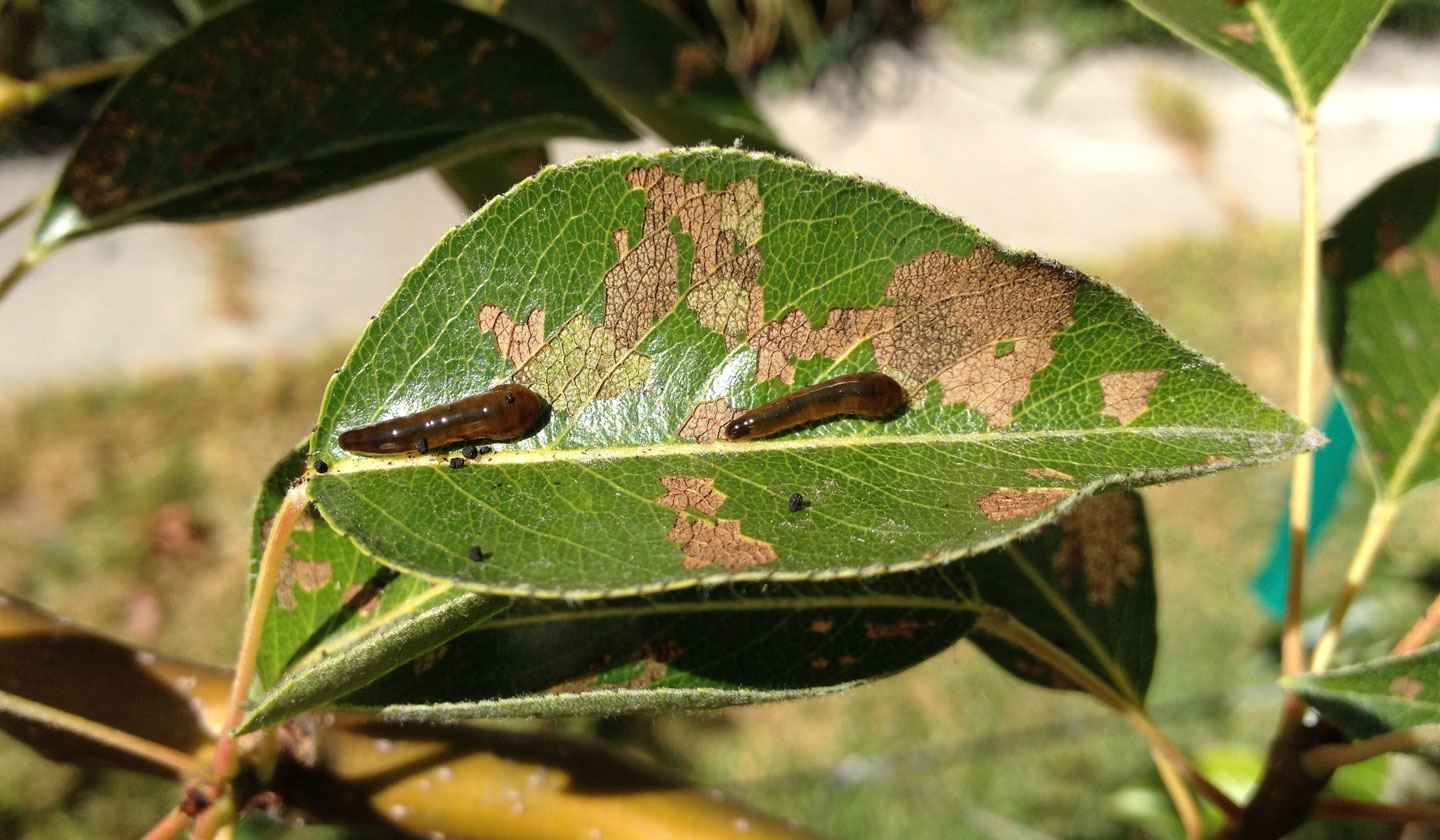
The larvae of the sawfly, the pear slug shows up as a black, inky slug on the leaves of pears, cherries, and plums. Easy to detect and easy to get rid off (blast off with a hose!), but left unchecked will decimate the foliage of your trees.
Learn MoreGUMMOSIS
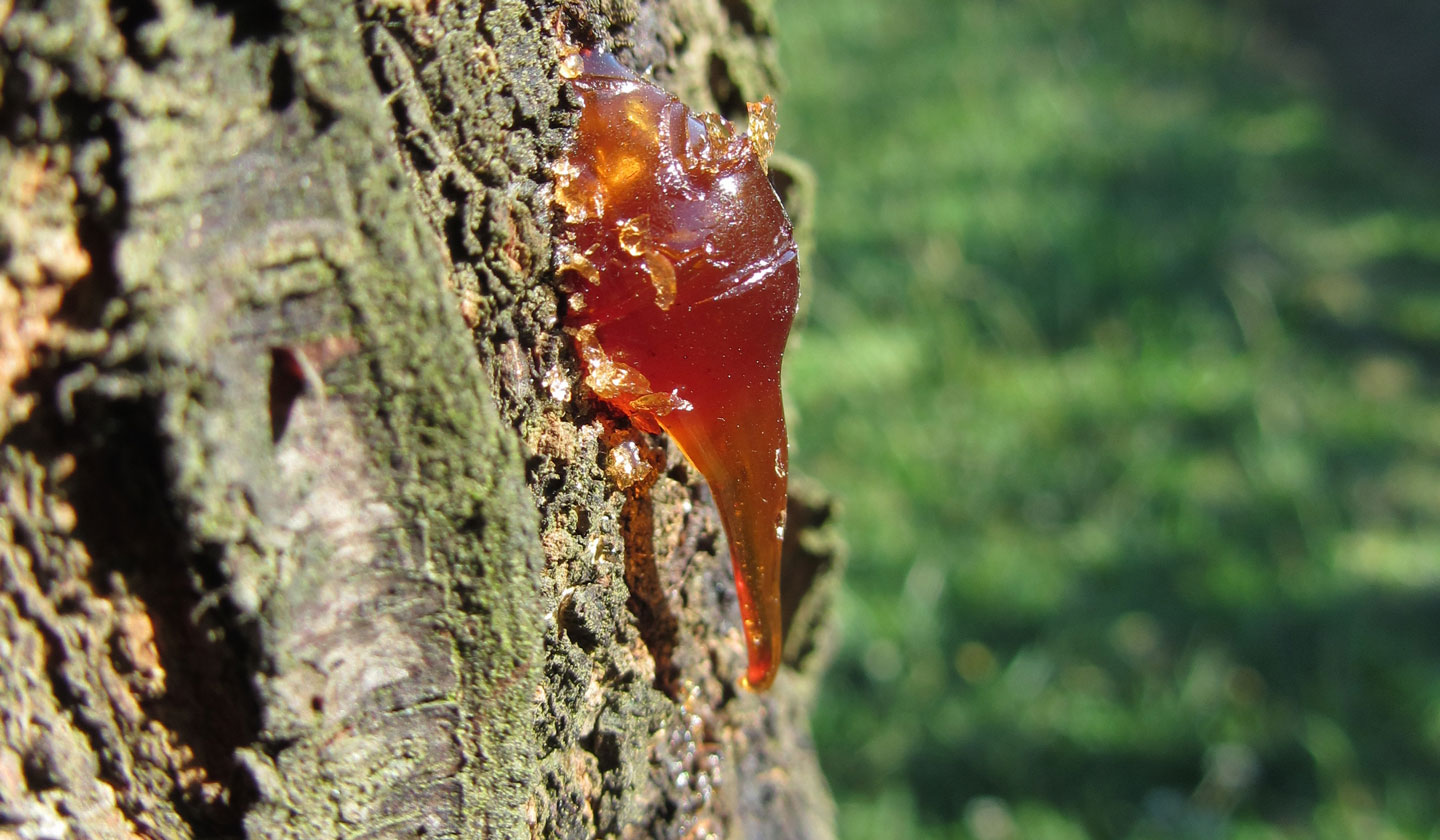
Generally is an indication that there is some infection happening in the tree. If it is on a small limb, its a good idea to remove the limb with a removal cut. If its on the trunk or on a major limb, better to leave it and work toward increasing the trees health with compost applications, appropriate watering, etc.
SPOTTED WING DROSOPHILA
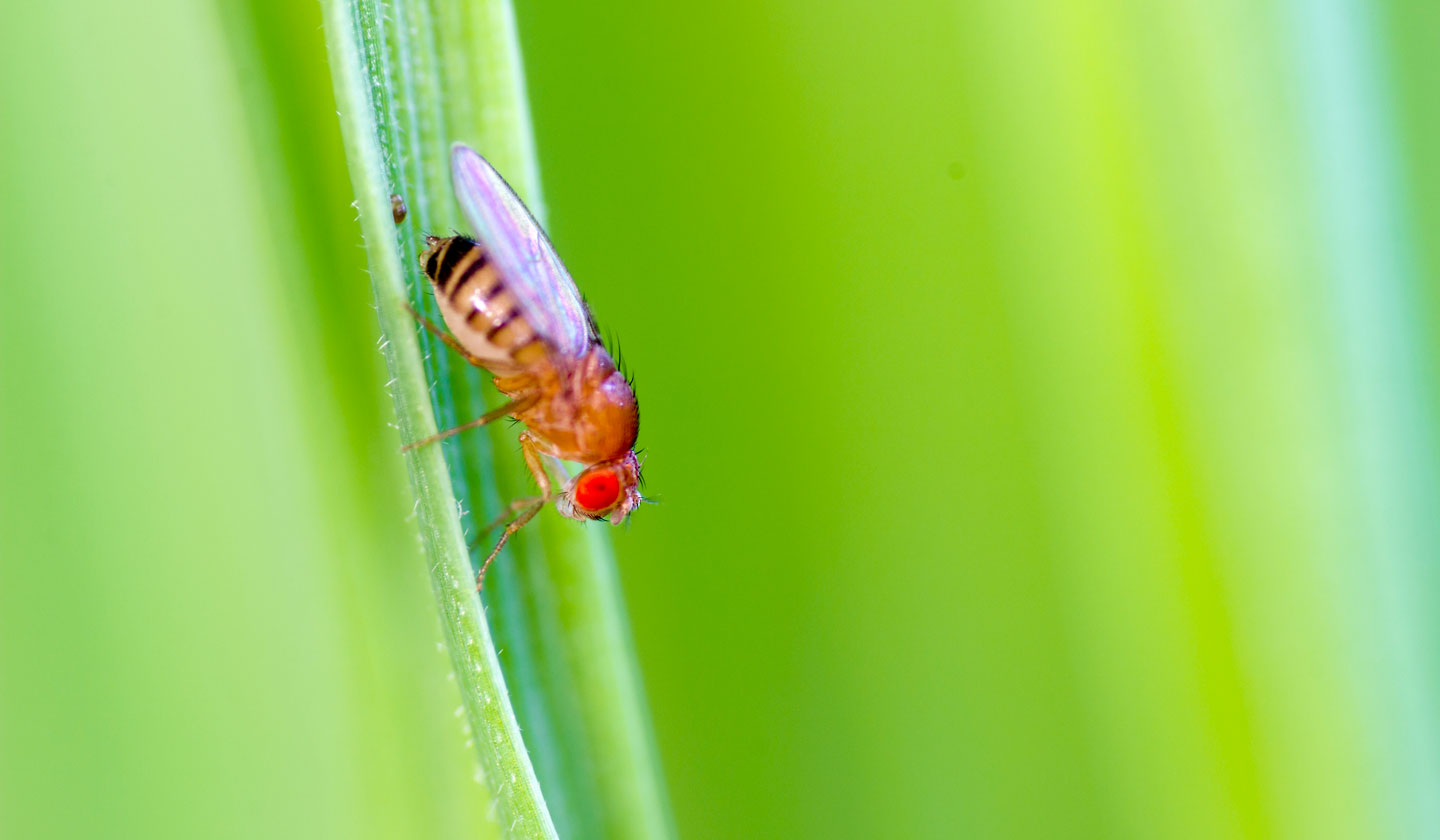
Spotted Wing Drosophila is a really horrible pest that has been wreaking havoc in our soft cane fruit for about six years. The adult female lays her eggs in the soft flesh of raspberries, blackberries, strawberries, plums and the larvae wake up and eat. You will know you have it when you go out to pick and their are many soft spots on your fruit. Open them up and you’ll see a little maggot squirming around. Yum. Monitor for the adults’ flight, using a container of vinegar. Once you see the flies in the vinegar, you can proceed with your control options. One non-spray option is to remove all the early fruit from your plants. This way the adults have nowhere to lay their eggs, therefore breaking the cycle.
Learn MoreCITRUS LEAF MINER

Adults lay their eggs on the leaves in mid-summer. The larvae emerge and tunnel in between the leaf cuticle, causing leaf deformation. It is mostly a cosmetic issue that you can somewhat easily control with pheromone traps. Hang them in early July.
Learn More